一、安装 PyOCD#
OpenOCD,Open On-Chip Debugger,主要使用 C 编写。
PyOCD,Python On-Chip Debugger,主要使用 Python 编写。
当前最新版本的 PyOCD 是 v0.42,其依赖的 Python 版本是 >= 3.8.0。
1
2
3
4
5
| $ python --version
Python 3.12.5
$ pip --version
pip 25.3 from C:\Users\Zeepunt\AppData\Roaming\Python\Python312\site-packages\pip (python 3.12)
|
这里我们使用 pip 工具安装即可。
1
2
3
4
5
6
7
8
| $ python -mpip install -U pyocd
...
Installing collected packages: pyocd
Attempting uninstall: pyocd
Found existing installation: pyocd 0.41.0
Uninstalling pyocd-0.41.0:
Successfully uninstalled pyocd-0.41.0
Successfully installed pyocd-0.42.0
|
查看版本信息:
1
2
| $ pyocd --version
0.42.0
|
查看其安装的路径:
1
2
| $ where pyocd
C:\Users\Zeepunt\AppData\Roaming\Python\Python312\Scripts\pyocd.exe
|
二、安装 VSCode 插件#
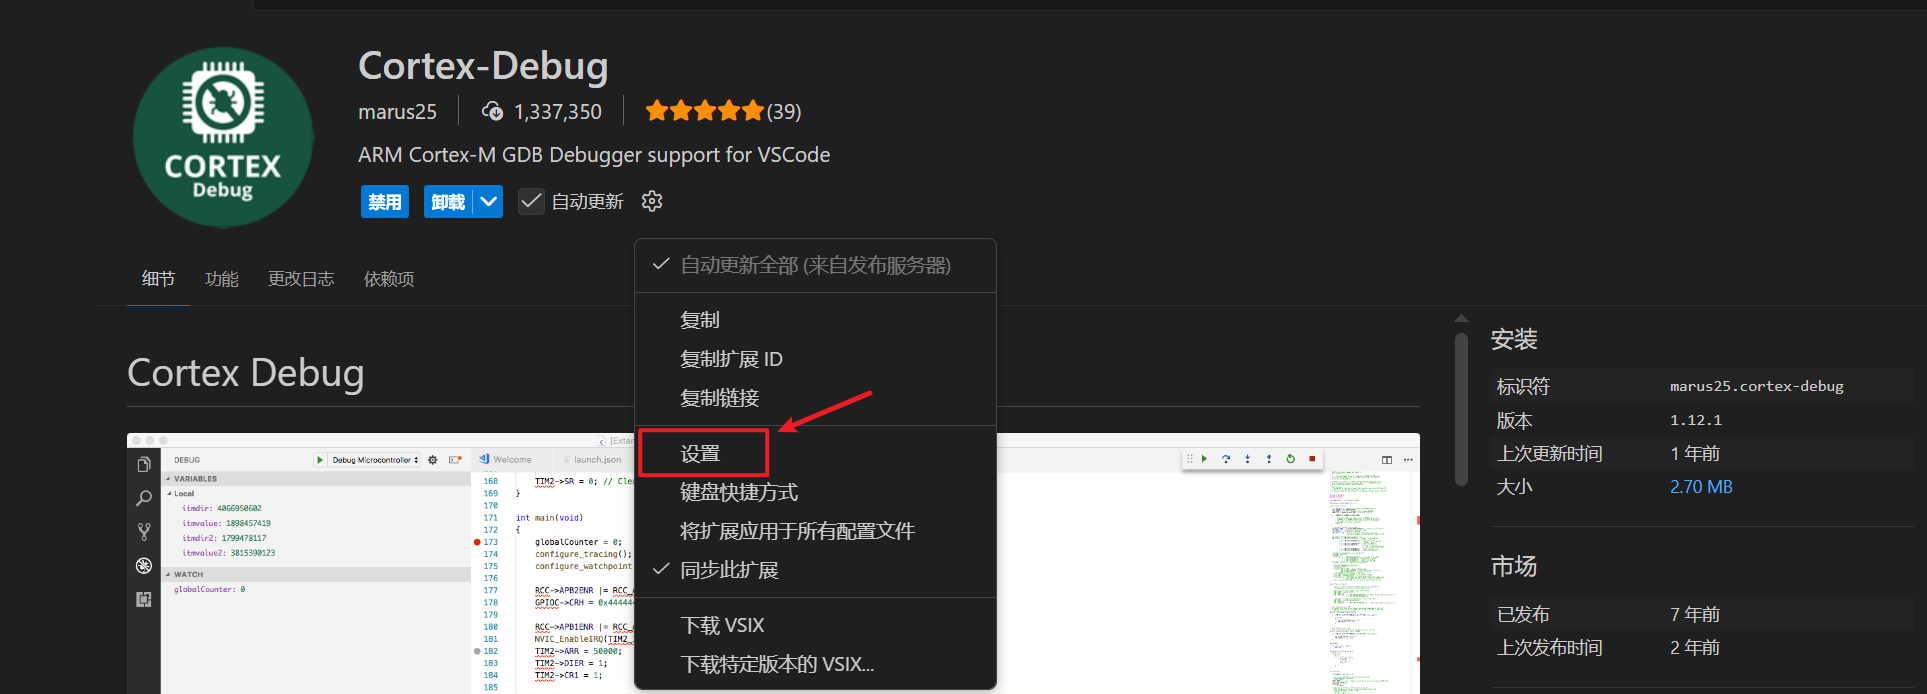
这里要安装的插件是 Cortex-Debug,这里的版本是 1.12.1。
安装完成后需要对其进行配置:
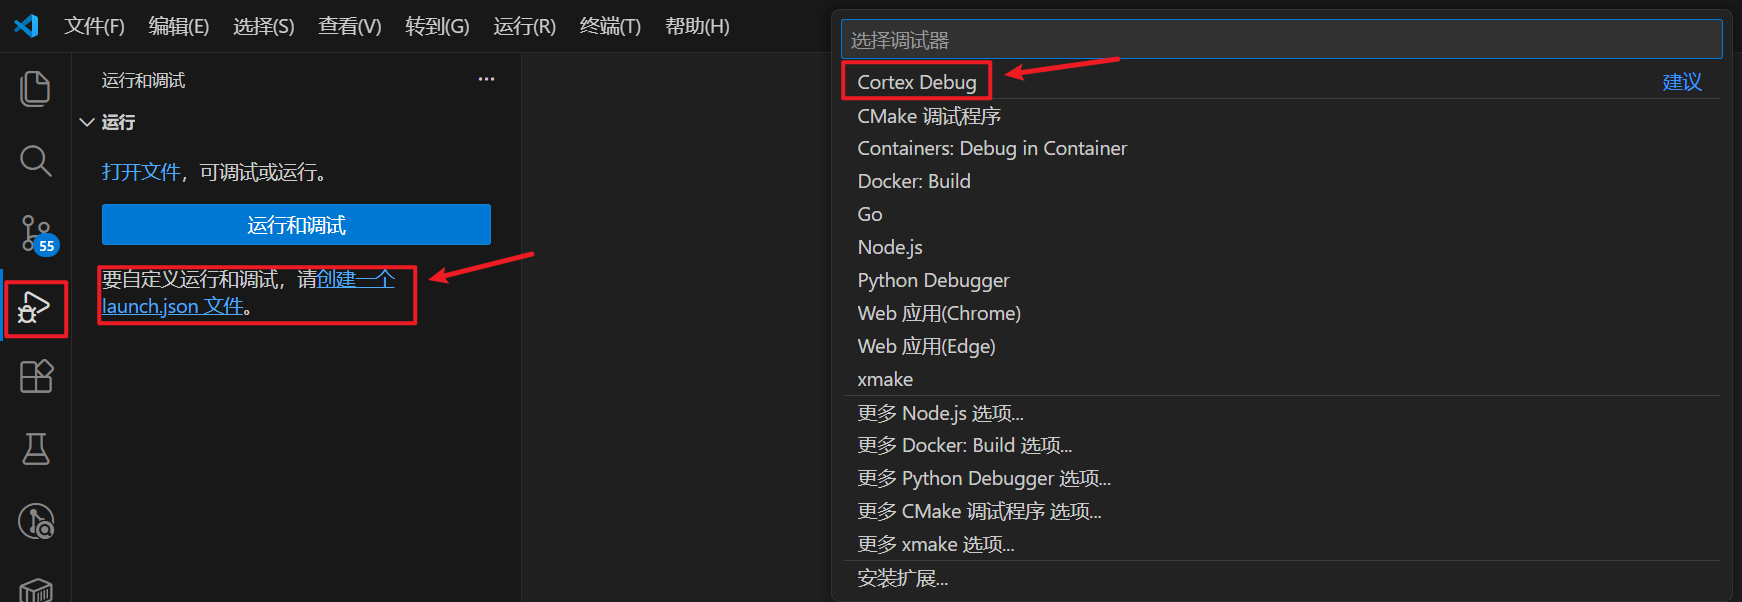
三、VSCode 调试配置#
新建一个调试文件 launch.json。
对于 launch.json 文件来说,其字段说明见:Cortex-Debug
1. STM32L475VET6#
这个 launch.json 文件是默认创建在 .../bsp/stm32/stm32l475-atk-pandora/.vscode 目录里面。
这里使用的是 ST-Link + 正点原子 stm32l475-atk-pandora,主控芯片是:STM32L475VET6。
所以我们要修改一下 launch.json 文件。
1
2
3
4
5
6
7
8
9
10
11
12
13
14
15
16
17
18
19
20
21
22
23
24
| {
"version": "0.2.0",
"configurations": [
{
"name": "stm32l475-atk-pandora",
"cwd": "${workspaceFolder}",
// 要调试下载的 elf 文件
"executable": "./rt-thread.elf",
"request": "launch",
"type": "cortex-debug",
"runToEntryPoint": "main",
// GDB 服务器类型
"servertype": "pyocd",
// GDB 服务器的路径
"serverpath": "C:\\Users\\Zeepunt\\AppData\\Roaming\\Python\\Python312\\Scripts\\pyocd.exe",
// GDB 路径
"gdbPath": "D:\\env-windows\\tools\\gnu_gcc\\arm_gcc\\mingw\\bin\\arm-none-eabi-gdb.exe",
// GDB 服务启动的匹配表达式
"overrideGDBServerStartedRegex": "GDB server listening on port",
// 芯片类型
"targetId": "stm32l475xe",
}
]
}
|
2. STM32WLE5CCU6#
这里使用的是 DAP-Link + 第三方开发板,主控芯片是:STM32WLE5CCU5。
这款主控在当前的 PyOCD 里面并没有内置,需要我们自己添加。
PyOCD 支持通过 CMSIS Device Family Packs(DFPs)安装:
1
2
3
4
5
6
7
8
9
10
11
12
13
14
15
16
17
18
19
20
21
| # 更新包索引
$ python -m pyocd pack update
0000633 I Updating pack index... [pack_cmd]
Downloading descriptors (1718/1718)
# 查找 stm32wle5 系列的芯片包 (不区分大小写)
$ pyocd pack find stm32wle5
Part Vendor Pack Version Installed
---------------------------------------------------------------------------------
STM32WLE5C8Ux STMicroelectronics Keil.STM32WLxx_DFP 2.1.0 False
STM32WLE5CBUx STMicroelectronics Keil.STM32WLxx_DFP 2.1.0 False
STM32WLE5CCUx STMicroelectronics Keil.STM32WLxx_DFP 2.1.0 False
STM32WLE5J8Ix STMicroelectronics Keil.STM32WLxx_DFP 2.1.0 False
STM32WLE5JBIx STMicroelectronics Keil.STM32WLxx_DFP 2.1.0 False
STM32WLE5JCIx STMicroelectronics Keil.STM32WLxx_DFP 2.1.0 False
# 安装
$ pyocd pack install STM32WLE5CCUx
Downloading packs (press Control-C to cancel):
Keil.STM32WLxx_DFP.2.1.0
Downloading descriptors (001/001)
|
对应的 launch.json 文件如下:
launch.json 文件是默认创建在 .../bsp/stm32/stm32wle5-example/.vscode 目录里面。
 1
 2
 3
 4
 5
 6
 7
 8
 9
10
11
12
13
14
15
16
17
18
19
20
21
22
23
24
| {
"version": "0.2.0",
"configurations": [
{
"name": "stm32wle5-example",
"cwd": "${workspaceFolder}",
// 要调试下载的 elf 文件
"executable": "./rt-thread.elf",
"request": "launch",
"type": "cortex-debug",
"runToEntryPoint": "main",
// GDB 服务器类型
"servertype": "pyocd",
// GDB 服务器的路径
"serverpath": "C:\\Users\\Zeepunt\\AppData\\Roaming\\Python\\Python312\\Scripts\\pyocd.exe",
// GDB 路径
"gdbPath": "D:\\env-windows\\tools\\gnu_gcc\\arm_gcc\\mingw\\bin\\arm-none-eabi-gdb.exe",
// GDB 服务启动的匹配表达式
"overrideGDBServerStartedRegex": "GDB server listening on port",
// 芯片类型
"targetId": "stm32wle5ccux",
}
]
}
|
获取 pyocd 是否支持当前的芯片类型:
1
2
3
4
| $ pyocd list --target | grep "stm32l475"
stm32l475xc STMicroelectronics STM32L475xC builtin
stm32l475xe STMicroelectronics STM32L475xE builtin
stm32l475xg STMicroelectronics STM32L475xG builtin
|
如果使用 PyOCD 时提示:Failed to launch PyOCD GDB Server: Timeout.
这是因为 PyOCD 启动 GDB 服务器时的打印更改了,从而导致 Cortex-Debug 无法识别 GDB 服务器已启动。我们可以配置文件来重写匹配规则:
1
2
3
4
5
| // 启动 GDB Server 的打印如下:
// 0001141 I GDB server listening on port 50000 (core 0) [gdbserver]
{
"overrideGDBServerStartedRegex": "GDB server listening on port",
}
|


